Get your Pages add-on up and running in no time with our step-by-step guide.
Step 1: Videoly script and widget position
👉 Ensure your unique Videoly code is placed on your store’s template
We recommend placing your unique script on your store’s template for all pages. This will make it easier to add videos to non-product pages down the line. The widget will not load on pages that don’t have available video content.
You can find your unique code in MyVideoly by navigating to
- ’Shop Settings’ – > ‘General’.
- Or contact us via support@videoly.co.
👉 Placeholders for widget position
The Videoly team is happy to help you configure a position for the widget on non-product pages. We also recommend adding placeholders to optimize Pages in the best way possible.
-
Title
<divid='videoly-page-title'></div> -
Location
<divclass='videoly-page-placeholder'></div> -
Page ID
<divid='videoly-page-id'>1234</div>
Step 2: Layout for non-product pages
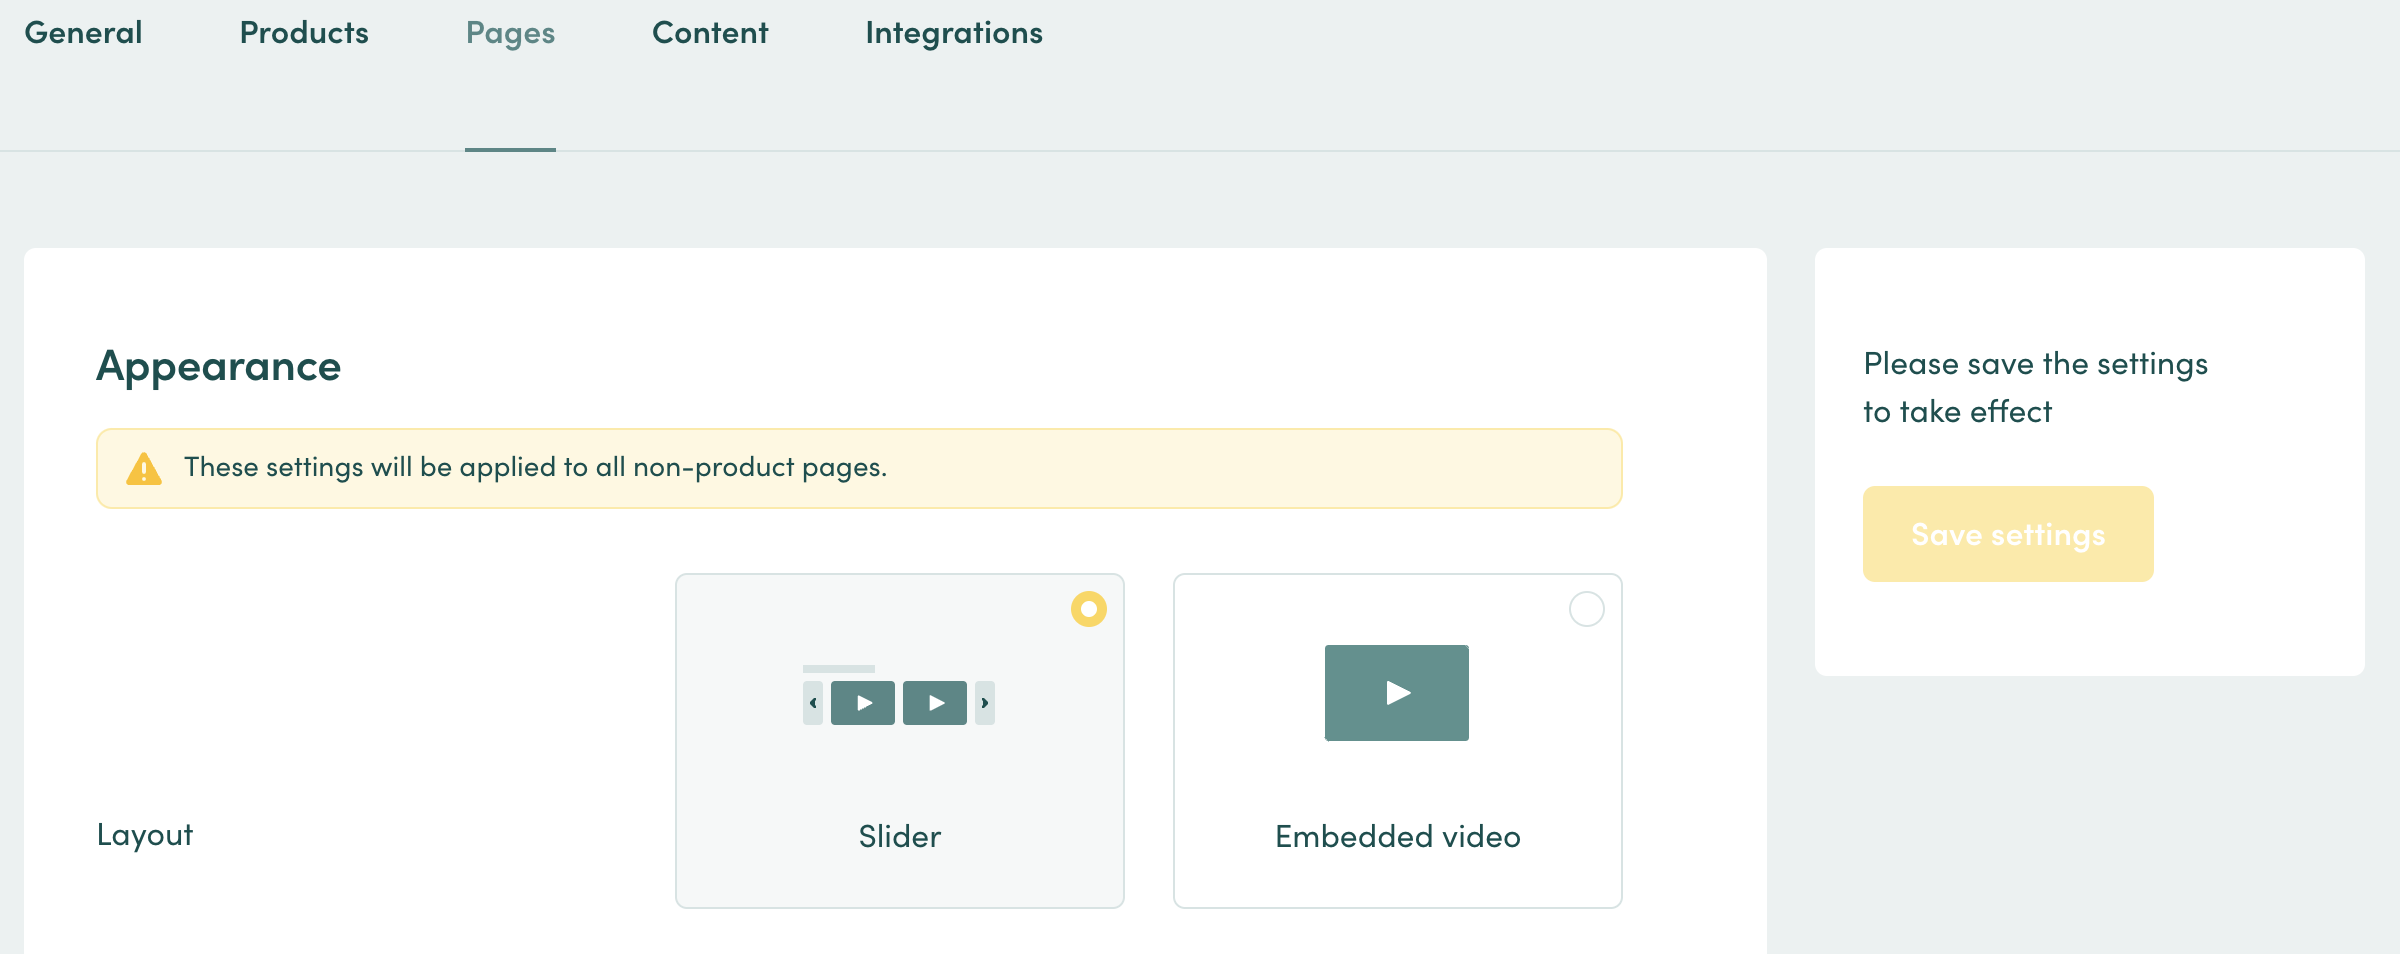
- Navigate to your Settings → Pages and select your preferred layout: Slider or embedded mode
- Click ‘Save settings’
💡By default, only one mode can be applied to all of your pages. Please contact us at support@videoly.co if you’d like to look into the possibility of using both modes for your non-product pages.
💡You may need to force reload your browser to see the applied changes. To do this, please hold down command + shift + R (Mac) or crtl + shift + R (PC).
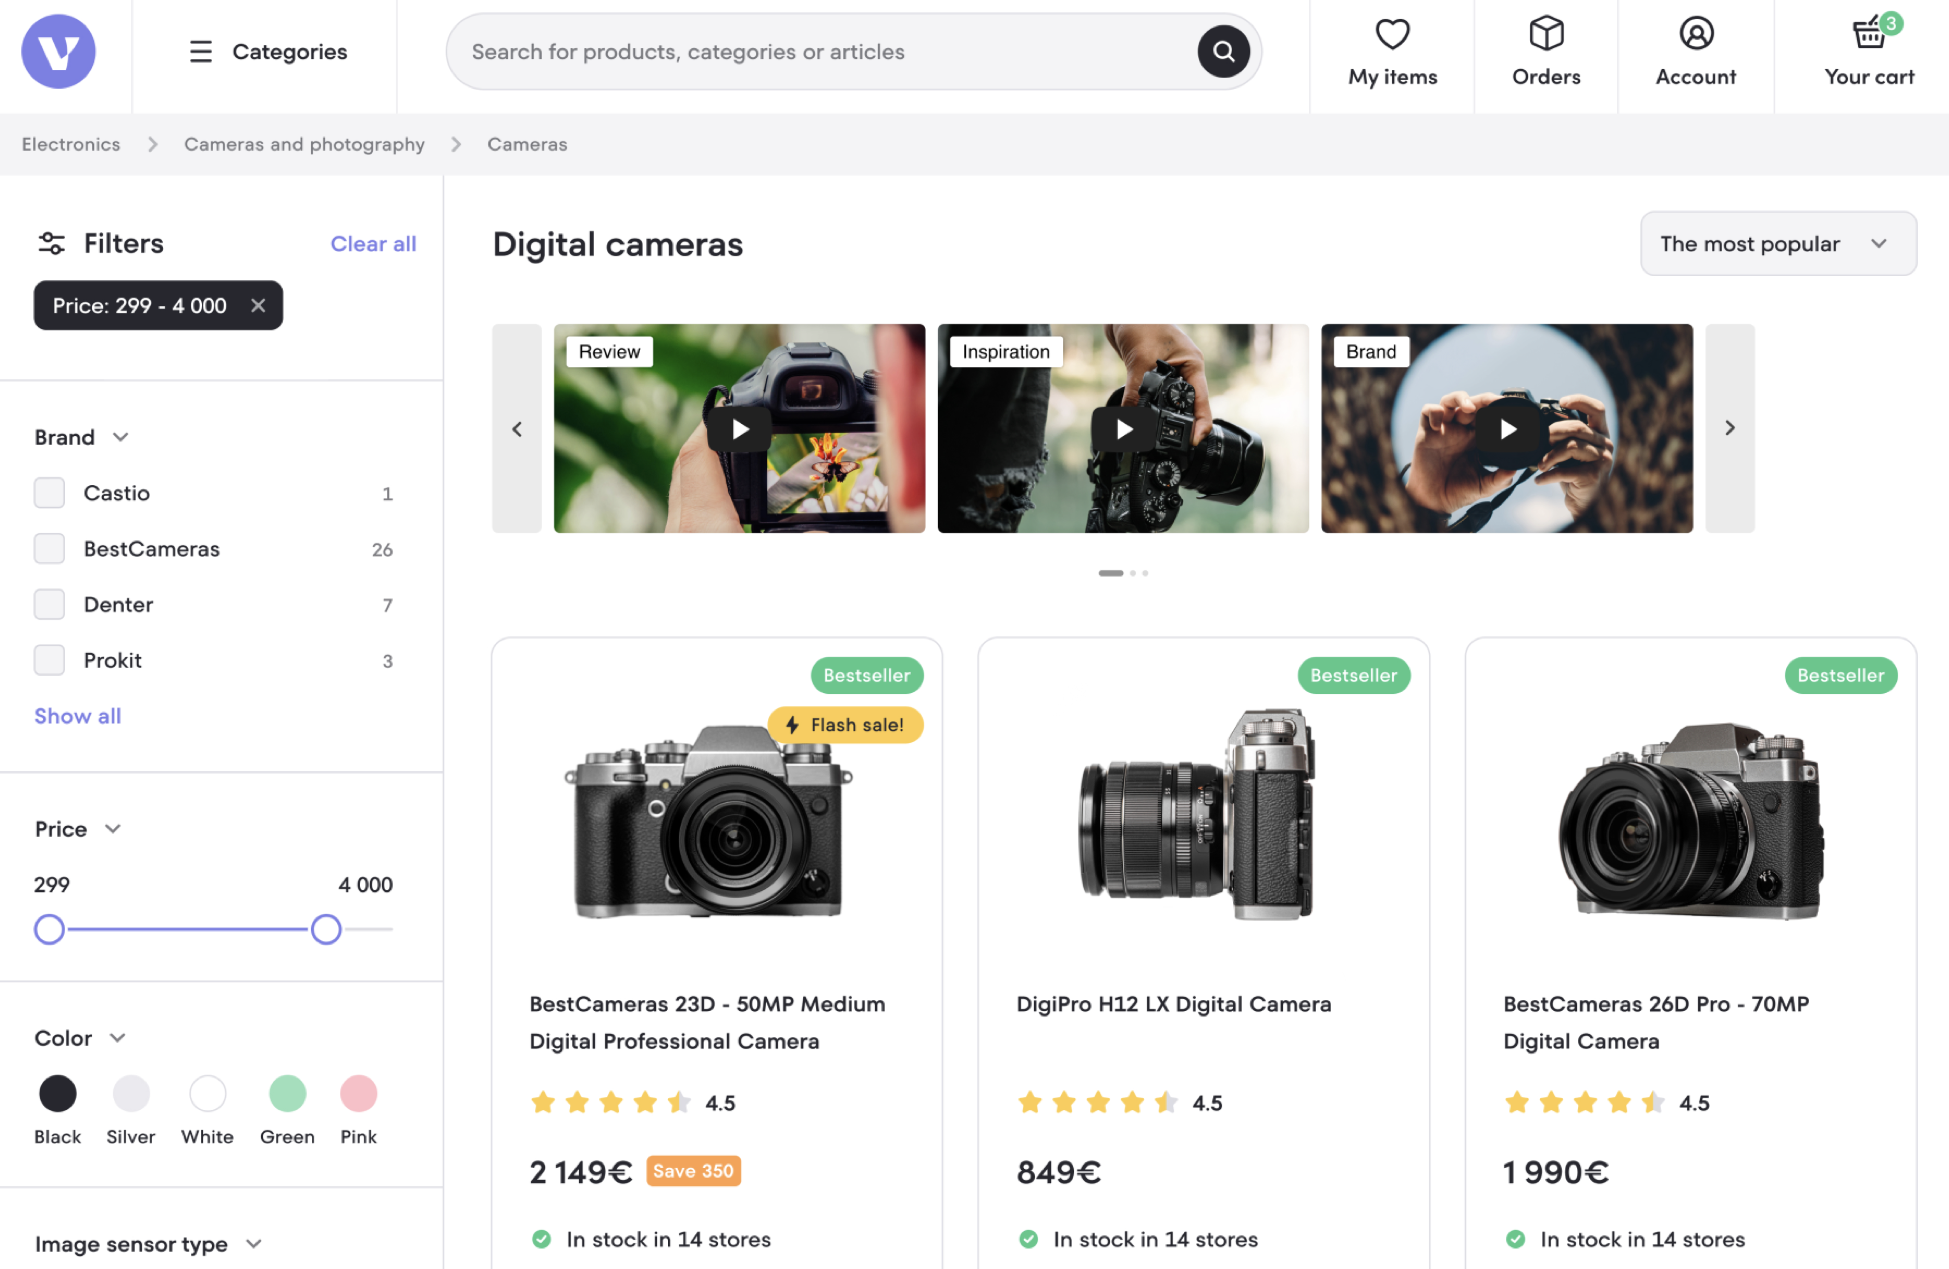
👉 Widget mode (slider)
- Widget mode can be independently styled from your PDP widget.
- For appearance settings, navigate to ‘Settings’ → ‘Pages’ and select your preferred widget styling for non-product pages
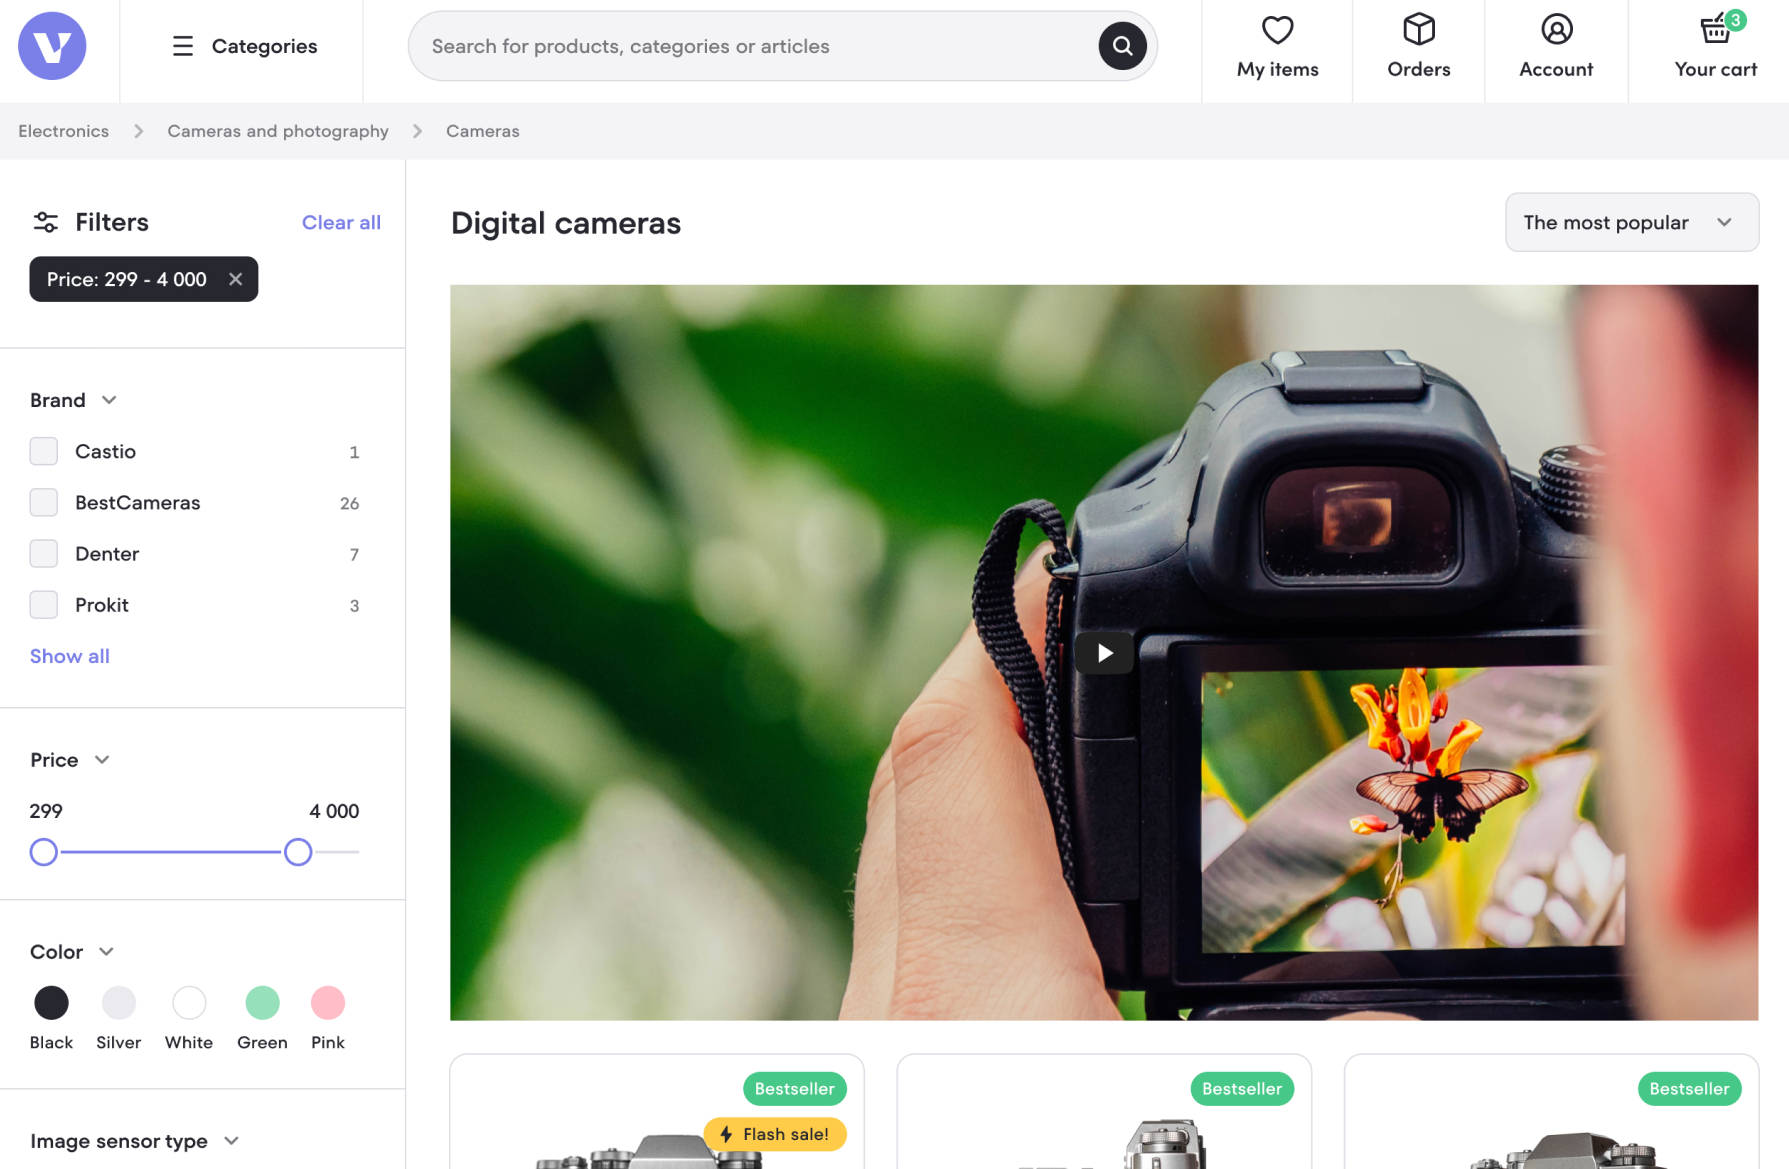
👉 Embedded mode
- Embed one, large YouTube player on non-product pages.
- The player's size is responsive, meaning it's dictated by the size of the container and will react to the user's window size.
- The player's appearance can't be customized (see YT terms and services)
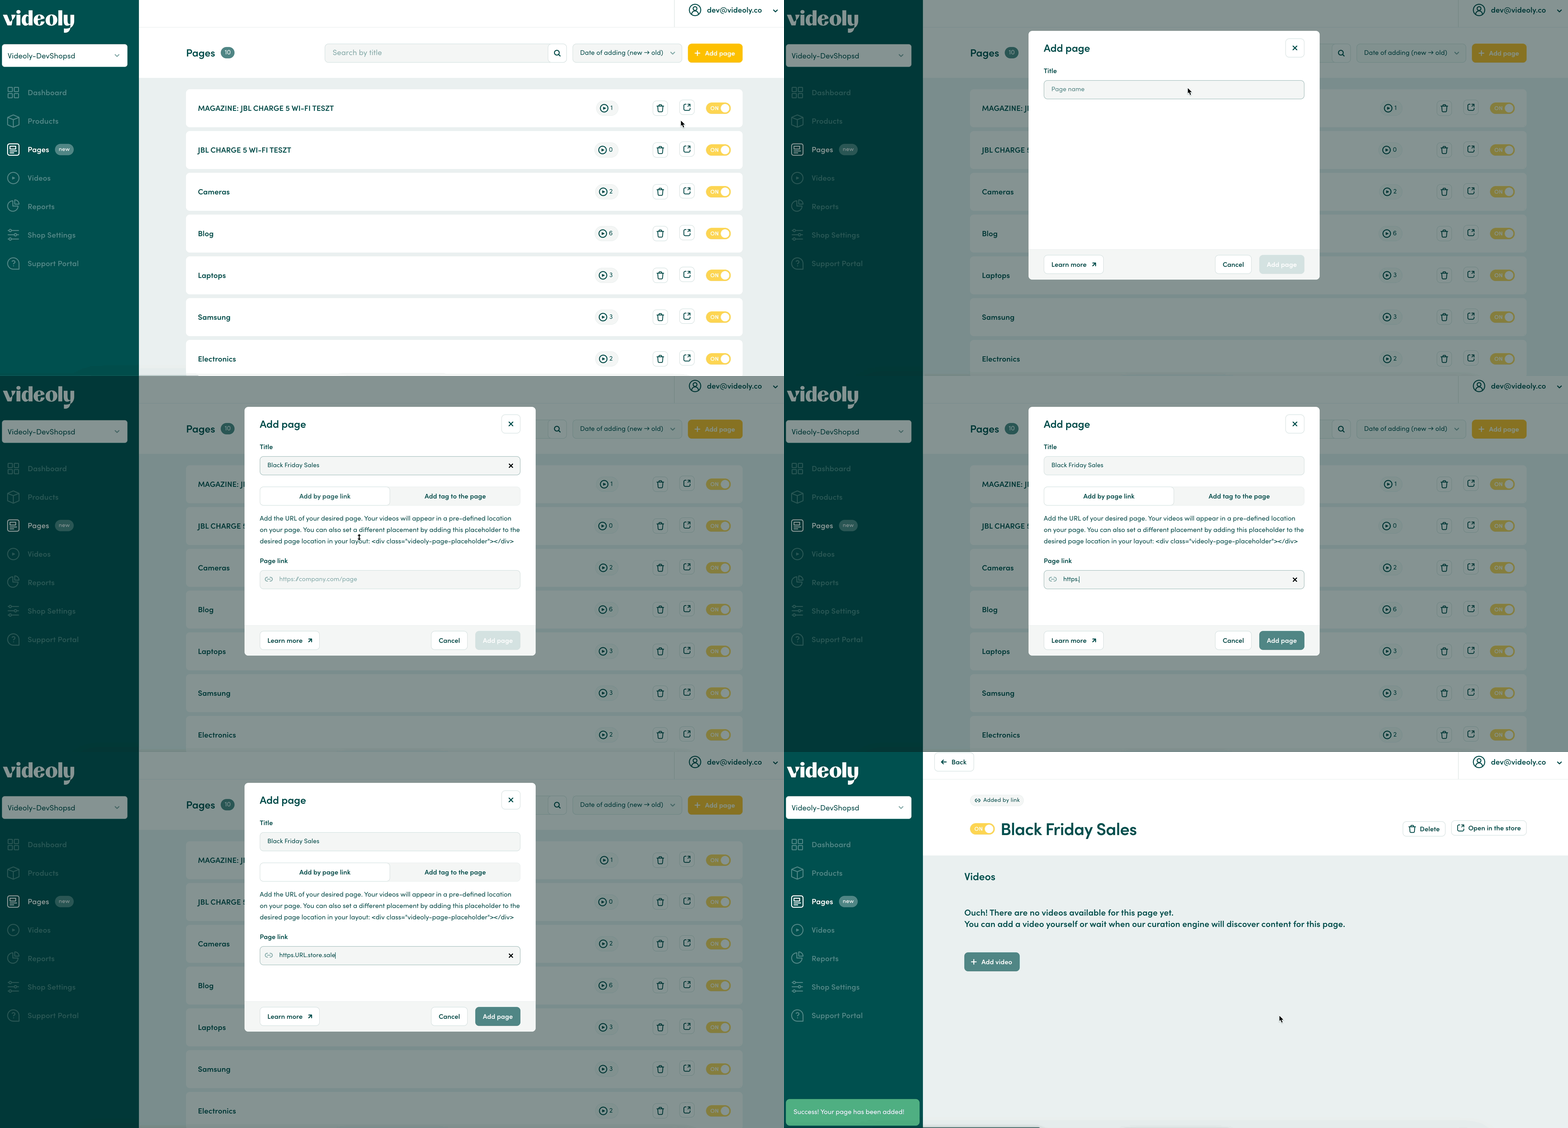
Step 3: Automated and manual adding of pages
Automated adding of pages
Whenever possible, Videoly will configure the widget to auto-created pages that are ready for you to work in your Videoly tool.
Similar to our process for product pages, a new page is created after it has been visited at least once, after your Pages add-on has been unlocked for you. You can sort your pages by title, date of creation and number of videos.
Manual adding of pages
- Navigate to your ‘Pages’ tab
- Click ‘Add page’
👉 Add by page link (recommended)
- Give your page a distinct title
- Paste the URL of the non-product page you'd like to add videos to under ‘Page link’
- Click ‘Add page’
💡Note: Query parameters are not saved when you add URLs via Pages, as these can distort analytics. MyVideoly will alert you to an existing query parameter, which will be automatically removed when saving.
👉 Add tag to the page
- Give your page a distinct title
- Click ‘Generate tag’
- Copy the generated tag from the pop-up window
- Paste the tag into the desired location of the page template, where you’d like your video(s) to appear.
- Note: Please avoid placing the tag on your general template, or any video you add will show on all pages that fall under that template.
Step 4: Add videos to your pages
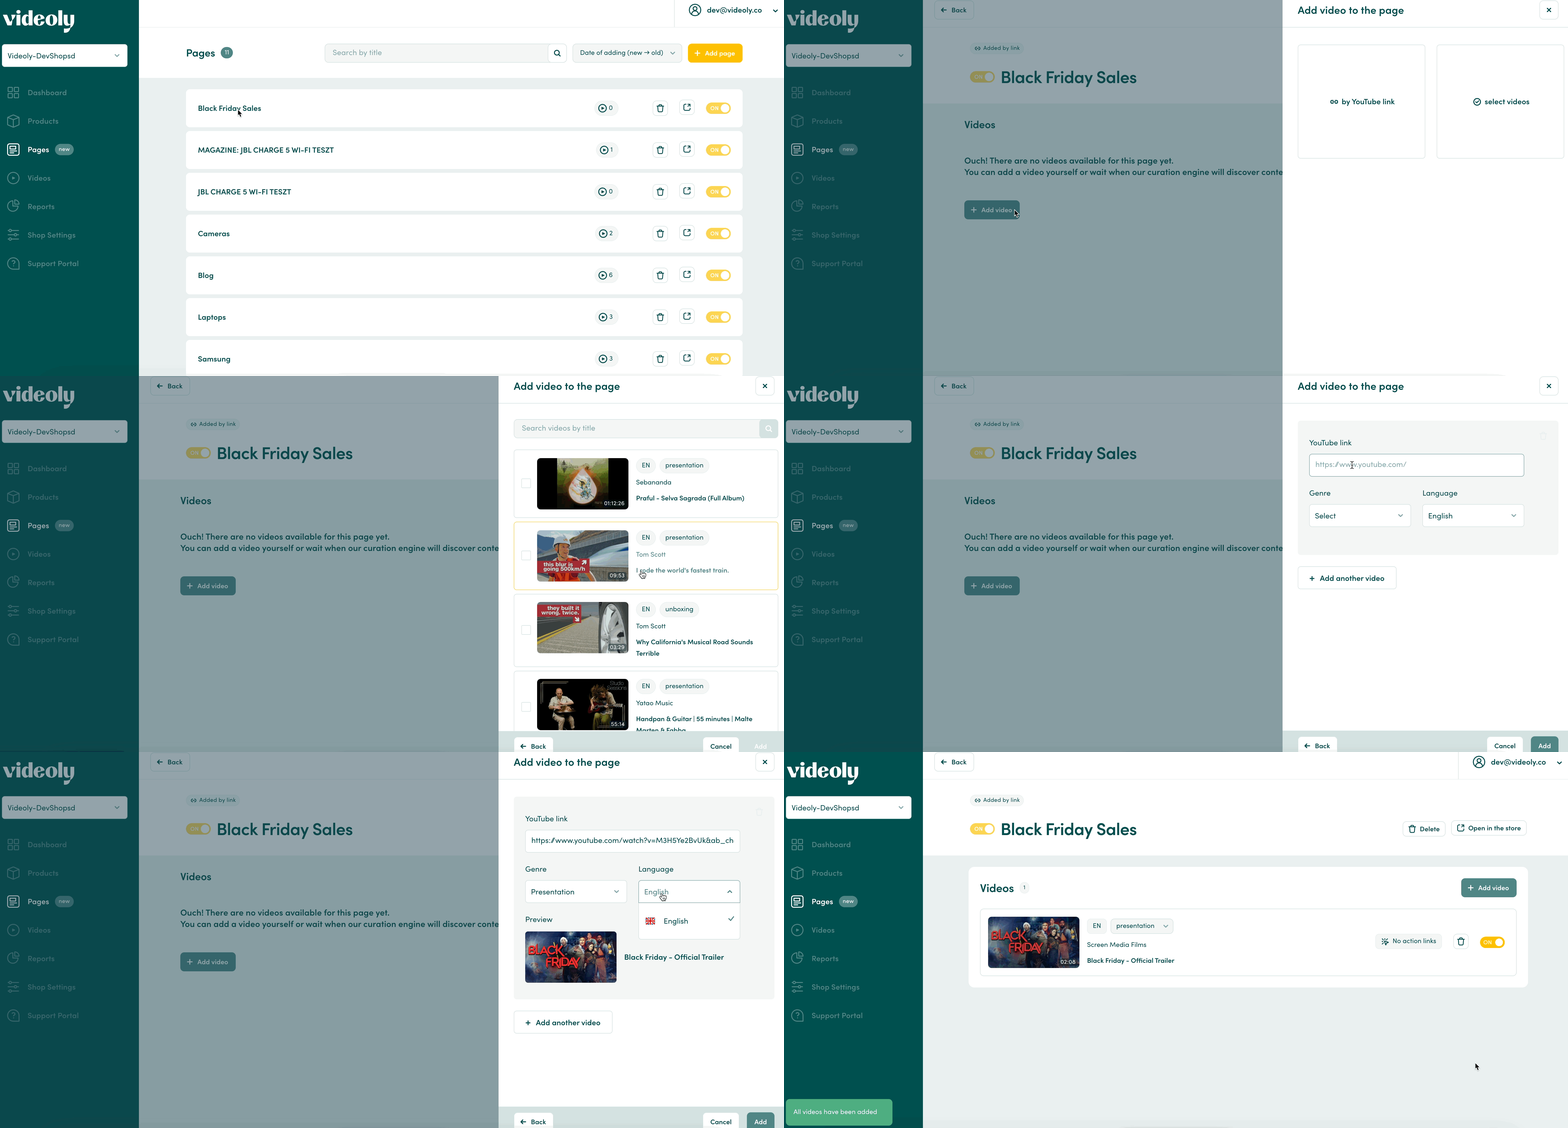
- Select the page you’d like to add a video to
- Click ‘Add video’
- You have two options: you can add a YouTube link or select a video from your library. The same embedding checks apply to videos added via Pages as we have in place for PDP videos.
💡 Widget mode: Drag-and-drop videos to rearrange the order in which videos appear on your page
💡Embedded mode: The top most video will show in your store. If this video becomes unavailable or is switched off, the next available video will show on your page.
Step 5: Add CTA links to your videos
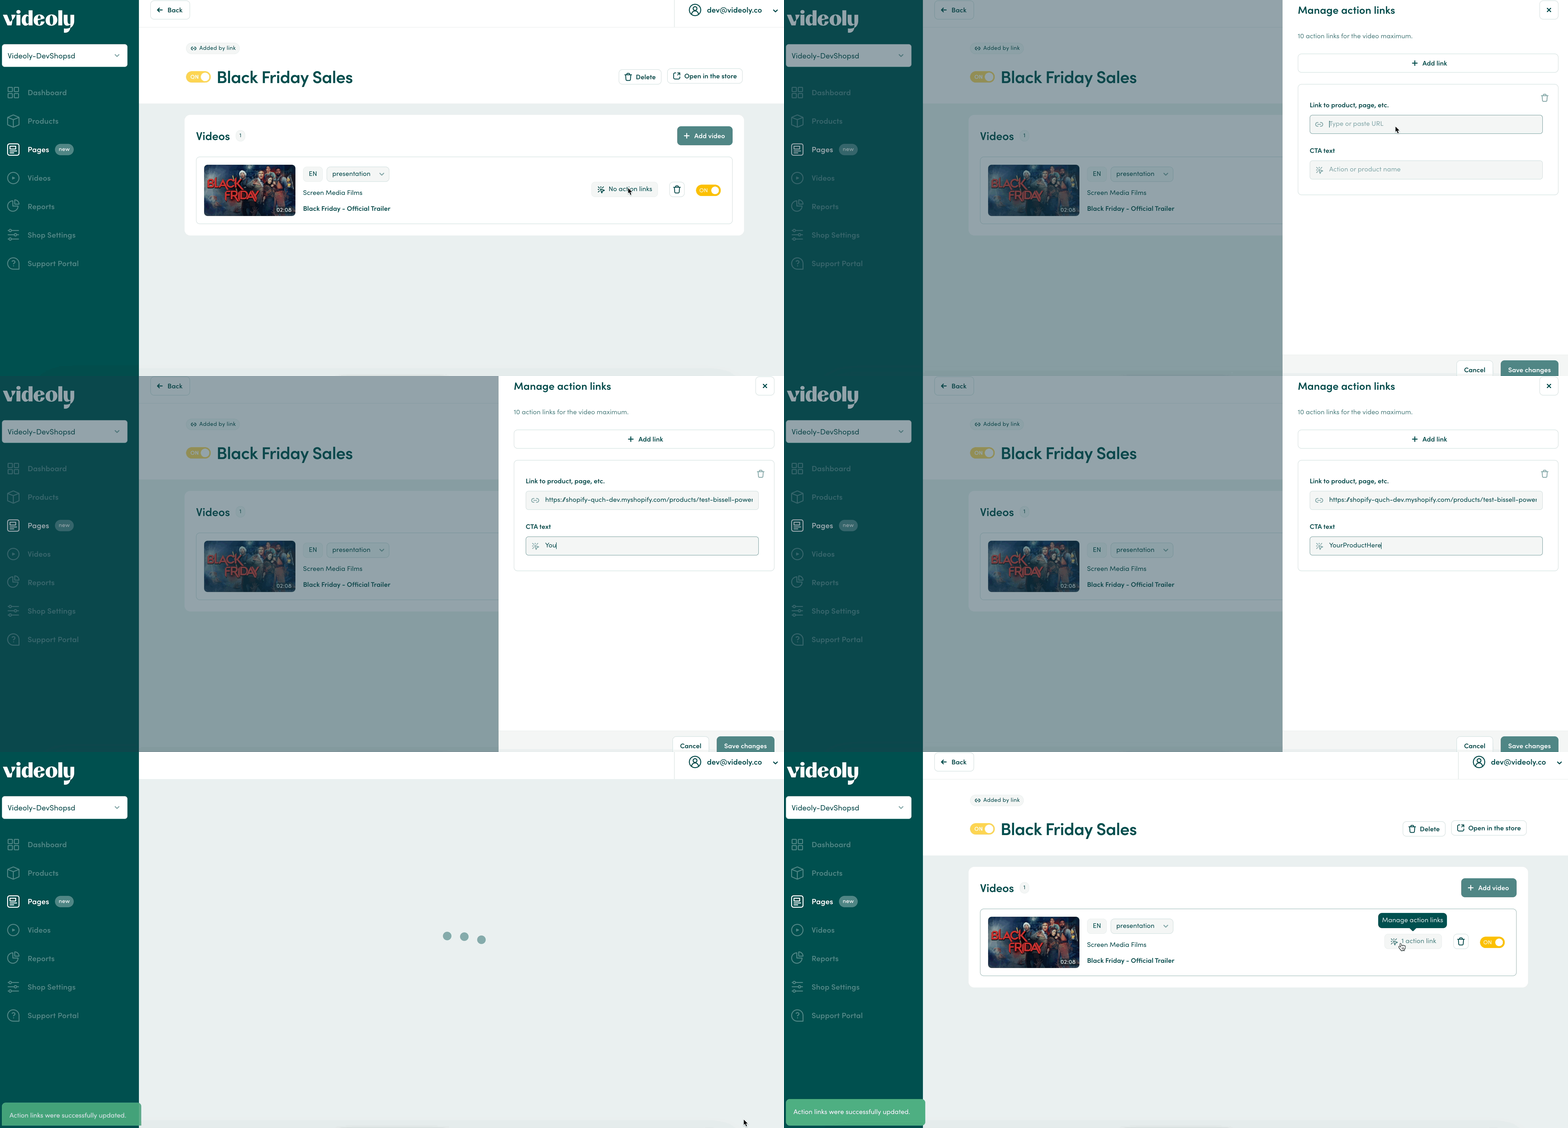
- Select the page you’d like to add CTA links to
- Click ‘No action links'
- Paste in the URL and type in your CTA text
- Click ‘Save changes’
- You can add up to 10 CTA links per video
More ideas for Pages?
We always appreciate your feedback and ideas on Pages: What are you enjoying? What would you like to see more of? What would make this feature complete for you? Please feel free to drop us a line at support@videoly.co.